


Happy Saturday, dear friends! At this moment, Sean and I should be about two hours into our trip to Lawrence. (I say 'should' because I am the worst when it comes to leaving on time. The worst, and that is no lie.) To keep you company this weekend, I thought I would share with you an easy planner DIY, that was born from my desire to have a functional, yet lovely, planner that I could put my own pages into!
To make your own planner, you will need:
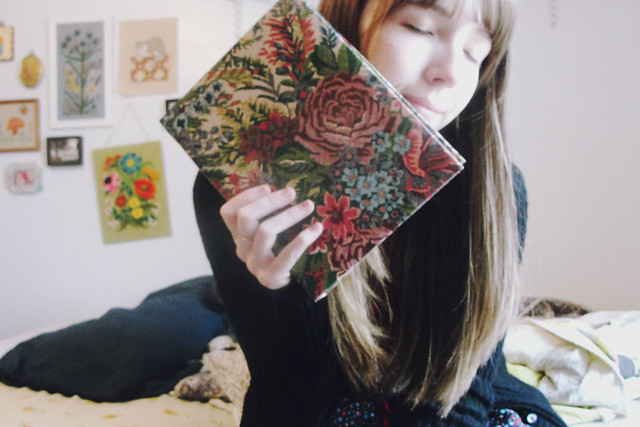
A mini-binder (I found mine at the thrift store for $0.50! It was originally an address book, but I just took out the pages.)
A few sheets of scrapbook paper, cardstock, or decorative paper (I picked mine up at Hobby Lobby.)
Scissors
A pack of 5.5"x8.5" paper
Page tabs (optional)
1. To make a divider, use a ruler and a pencil to draw a 5.5" x 8.5" rectangle with a tab on a sheet of scrapbook paper. I measured my tab to be about 5/8" wide, and 1" tall, so I had plenty of room to write.
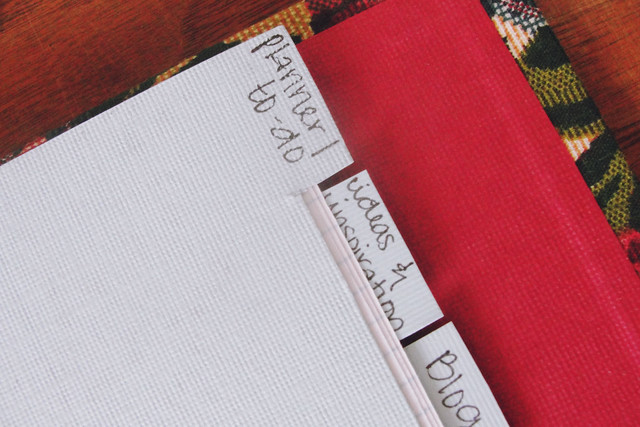
2. Cut out your new divider, and use it as a template to make as many dividers as you would like. I made four - Planner/To-Do, where I keep my calendar and to-do lists; Ideas & Inspiration, where I jot down anything that strikes my fancy, as well as keep my lists of books to read, places to go, and movies to see; Blog, where I keep my blog plans, post ideas, and sponsorship info (which I'll share soon! :]); and The Folklore Cabin, which is where I write down product ideas, color schemes, and patterns.
Make as many tabs as you like though, for whatever your needs are! **Make sure to stagger your tabs down the right side of your dividers though, so they line up separately and not behind each other. Remember to hole punch your new dividers!
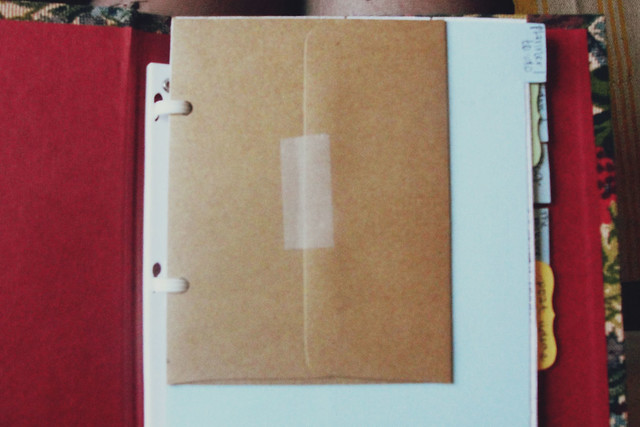
3. Take your pack of 5.5" x 8.5" paper and your dividers, and put them in your new planner! Jot down whatever strikes your fancy! To separate my each section inside of my dividers, I used these adorable page tabs from Martha Stewart, which I found at Staples. I also hole-punched a kraft envelope to put in my planner to hold business cards and such.

Et voila! Now you have a fancy, customized planner to call your own!
I'll be back soon with photos from our weekend adventure!
Have a lovely weekend,
xo, A.
No comments:
Post a Comment
Thank you for reading my little blog! I love reading your thoughts! If you have any questions, email me at ofallthenonsense@gmail.com. xo, A. ❤